Introducing Travis CI
Introduction
ToughtWorks.com describes continuous integration as
A development practice that requires developers to integrate code into a shared repository several times a day. Each check-in is then verified by an automated build, allowing teams to detect problems early.
A very important aspect about CI (continuous integration) that you need to understand is that it does not get rid of bugs in our application, but it does make it easier to identify and remove them.
Here comes Travis CI
Travis CI is a continuous integration tool used by many developers around the world. Services like Travis CI allow developers to test their applications when pushing code to the central repository where the code is stored. In other words, it runs the test suite each time a developer pushes new code up to the repository.
An important part of continuous integration we need to understand is that it runs the test suite for your application. In other words, we must have tests written for our app to verify it works as it's expected. Thankfully, we've already written a few tests, and we'll continue to write even more as we go on.
Setting up Travis CI in our repository
Getting started with Travis couldn't be easier. We simply need to login with our Github account, select the repository we'd like to activate, and we're pretty much ready. Travis is free for all open source projects. If you want to use it with a private repo, you'll need to sign up for one of their plans. In our case, since PingPing is public, we can get started for free.
After logging in with our Github account, we can see a dropdown of all our public repositories. We'll select the PingPing repository to activate it with Travis.
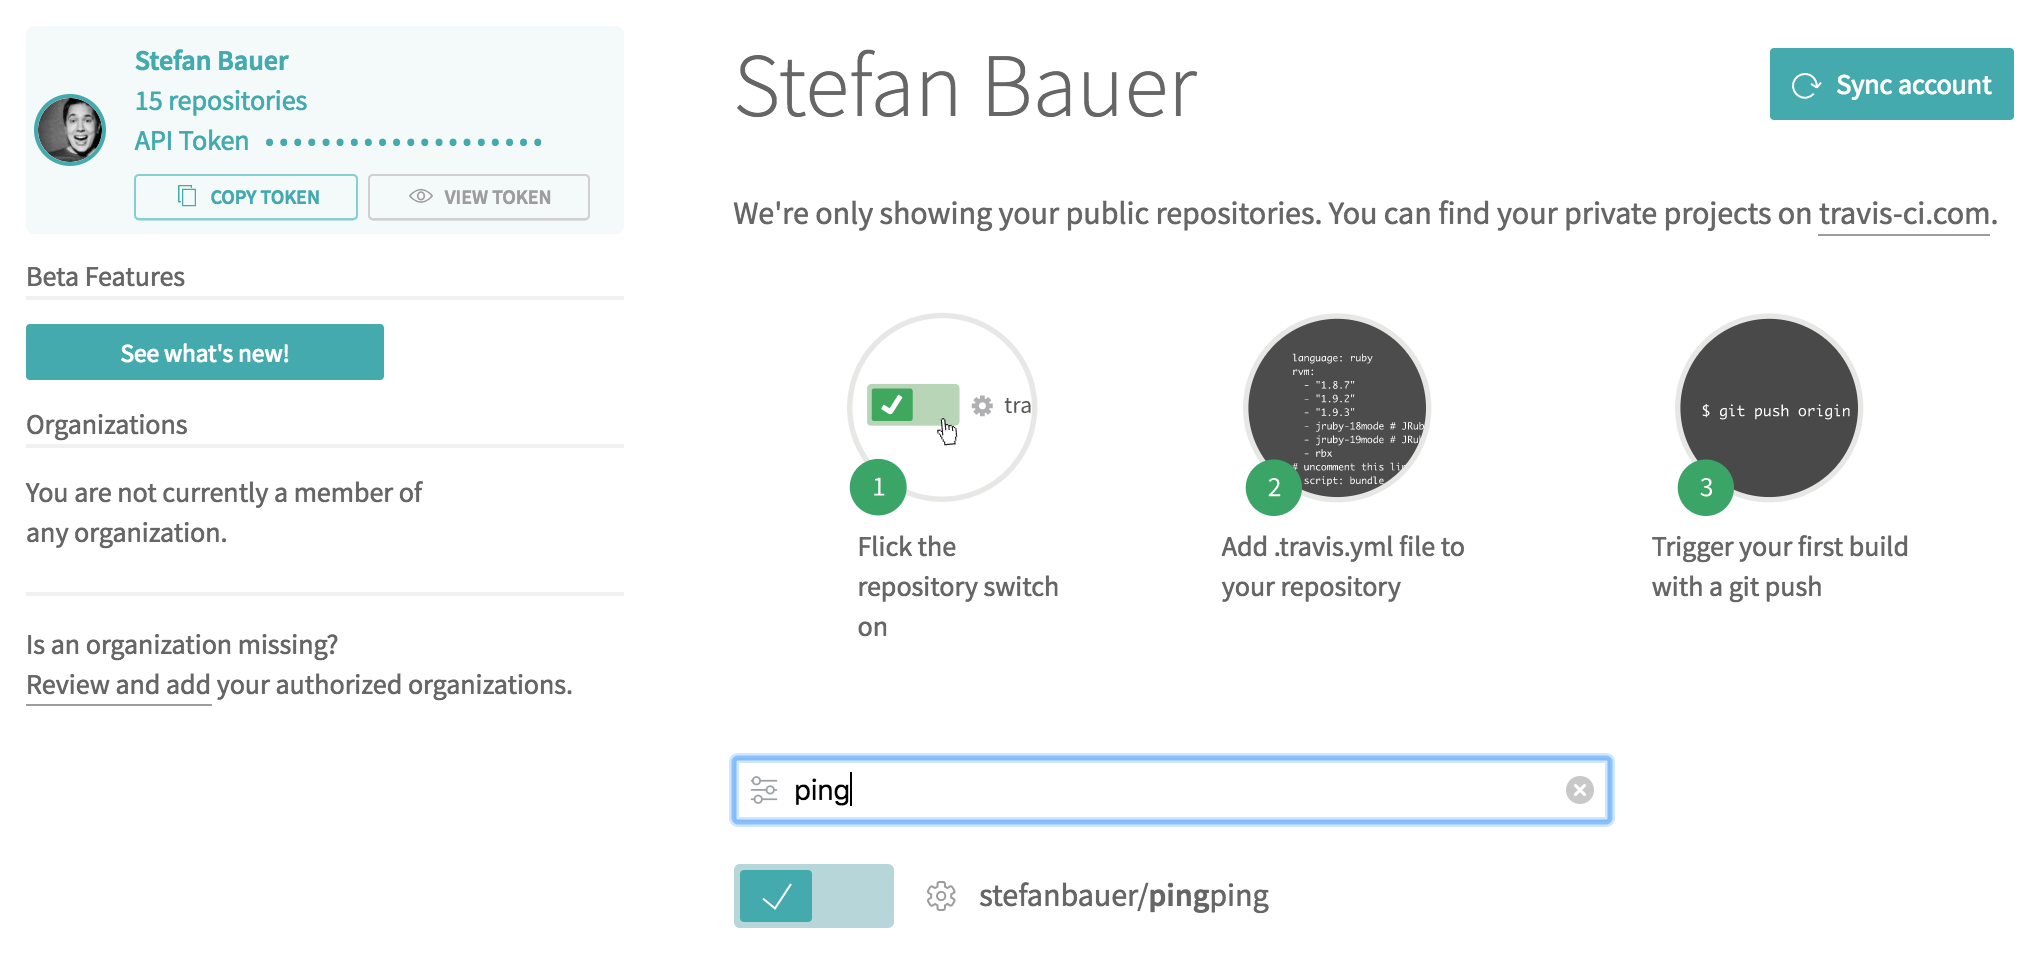
Let's set up our repository for Travis CI
Now that we've selected the repository from the Travis dashboard, we need to add a couple of new files in our repository so we can have a bit more of control of what Travis is doing.
We will create two files. A .env.travis file that will have Travis specific environment variables and a .travis.yml file that will have some configuration settings for Travis.
--- /dev/null
+++ b/.env.travis
@@ -0,0 +1,6 @@
+APP_KEY=
+
+DB_CONNECTION=mysql
+DB_DATABASE=pingping_test
+DB_USERNAME=root
+DB_PASSWORD=
In this file, we only added the required configuration so that Travis can test our Laravel application. We set our connection to be MySQL, specified the database name and the username and password to connect to it. To be honest, we could use SQLite as well, but I prefer to have quite the same environment as on my production machine later.
--- /dev/null
+++ b/.travis.yml
@@ -0,0 +1,21 @@
+language: php
+
+php:
+  - 7.1
+  - 7.2
+
+before_script:
+  - cp .env.travis .env
+  - mysql -e 'create database pingping_test;'
+  - composer self-update
+  - composer install --no-interaction
+  - php artisan key:generate
+  - yarn install
+  - yarn run prod
+
+script:
+  - vendor/bin/phpunit
+
+cache:
+  directories:
+    - vendor
In this configuration file, we can specify a few options that are very important for Travis to do its job. First of all, we need to specify the language our project is written in, in this case, since we are using Laravel, we set it to php.
We also specify what versions of php we'd like Travis to test our code against. In this case, we are only worried about version 7.1 and 7.2 of the language.
The before_script key is very important since it tells Travis what commands it needs to run to get the app ready before running the tests against it. First of all we are creating our .env file by copying .env.travis we created earlier, without this file our application will not work. We also created the database we specified in our .env.travis file, update composer and run the composer install --no-interaction command to install all of our dependencies. We also run php artisan key:generate to generate our secret application key, we install our javascript dependencies and then compile them with the yarn run prod command.
You might be asking why are we installing and compiling our Javascript dependencies if we are only running php tests with Travis. Well, the answer is pretty simple. Laravel will throw an error if it doesn't find a public/mix-manifest.json file and this file is generated when you install and compile your assets with Laravel Mix.
What Now?
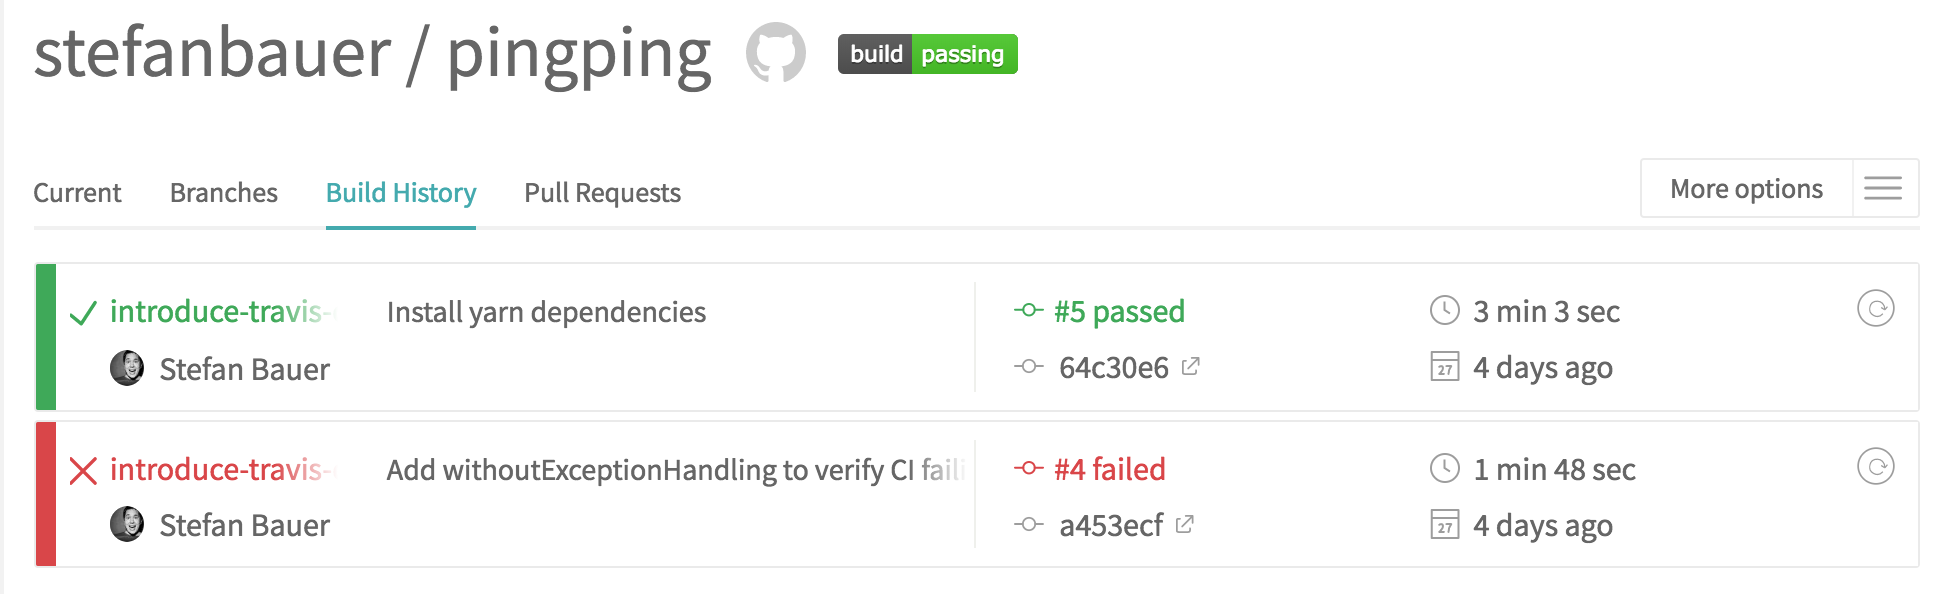
Now that we have Travis setup in our application, it will check all new commits and PRs against our test suite. We'll add a little badge Travis CI provides so that we can easily see what's the status our application, it will show us if the last build it did against our application was successful or not. We'll add a README.md file so that anyone who visits the repository can see the status of our application.
--- /dev/null
+++ b/readme.md
@@ -0,0 +1,4 @@
+# PingPing - Simple Website Monitoring
+[](https://travis-ci.org/stefanbauer/pingping)
+
+This is a simple website monitoring built in public by [@stefanbauerme](https://twitter.com/stefanbauerme) at [https://stefanbauer.me/building-pingping/](https://stefanbauer.me/building-pingping/).
Now that we have Travis CI ready in our repository, we can continue to work with an assurance that our application is being tested every time we update anything in our repository.
Thanks for keeping up with all the blog posts, I hope you enjoyed this one. In the next episode we'll build the landing page for PingPing.