These git aliases make my daily work faster and easier
My personal approach has changed during the last years over and over again. However, meanwhile, I always use the same aliases. In this post, I assume that you know what aliases are and how they are used. I will show you some really cool things which are possible with aliases.
In case you don’t know how to add aliases, you can add all the examples below in the [alias]section in your git configuration file. In most cases, this is a .gitconfig in your home directory.
Pro-Tip: With git alias a list of all your configured git aliases is shown. For the people who can’t remember all the aliases, they set up.
You have also to use this global configuration, that you get the wonderful formatting in the history I have. This should also go to your .gitconfig.
[pretty]
    changelog = format:* %h %s pretty-history = format:%Cred%h%Creset -%C(yellow)%d%Creset %s %Cgreen(%cr) %C(bold blue)<%an>%Creset
For anyone who doesn’t know how this works:
You can specify different and custom “prettys” in your .gitconfig. In your git log command you can then specify them within an option like pretty=<your-custom-pretty>. Cool, hm? You will see it several times in the tips below.
Anyways... let’s get started!
1. Always being up to date
I will start with the first command, which is not a real git alias. But I still use it a lot. I really never use git pull or so. It’s called git up. You can find it here: https://github.com/aanand/git-up
It fetches all locally tracked remote branches and rebases them. Really helpful! So with the command git up all branches are up to date!
2. The every-day basic aliases
These are the absolute standard abbreviations that I use. Nothing special. I just want to include them here, because I use them a lot. A lot more than git up.
st = status
ci = commit

co = checkout
co-staged = !git diff-index --cached --name-only --diff-filter=ACMR HEAD | xargs git co

di = diff
staged = diff --cache
di-staged = !git diff-index --cached --name-only --diff-filter=ACMR HEAD | xargs git di

dilc = diff --cached HEAD^

fa = fetch --all -v
ff = pull --ff-only
rv = remote -v

pt = push --tags origin master:master develop:develop
Here is a very quick explanation of some of them, because i think most of them should be clear and are nothing special.
git coandgit co-stagedare quite the same. The only difference is, thatgit co-stagedchecks the files out, that have the state in the staging area. Quick Example: Add a file to the staging area (State A), modify the same file (State B). If you are unhappy with the result, you can restore State A (from the staging area) with thisgit co-staged.git diandgit stagedare also quite the same. But guess what, the only difference is, thatgit stagedshows only the diff from the files in the staging area. In both cases it shows the diff to your working tree.git di-stagedis really cool. It is similar togit stagedbut the difference is, that it shows the diff between the staging area and your modified files.git dilcgives you the diff between your working tree and the last commit.git fafetches all remote but be verbosegit ffapplies the changes from remote only when it would be possible via fast forwardgit rvshows remote information with a verbose level (for instance url and such information)git ptpushes all tags on master and develop. This is what I use, when I finished a release or hotfix in the known git flow.
3. History and Browsing
Here are some aliases I use regularly for browsing repositories
3.1 Change-Log
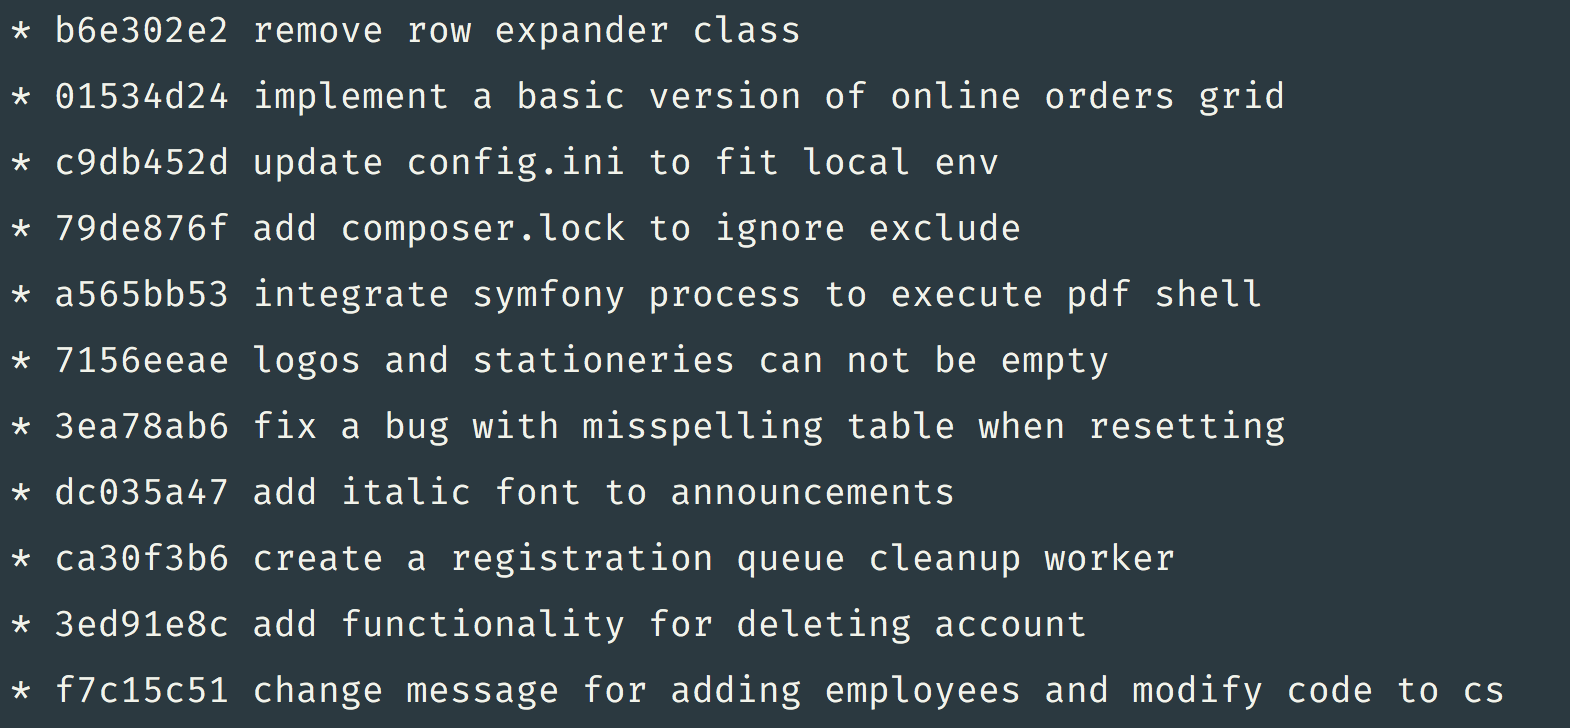
This is something I use when I copy and paste it as kind of a Change-Log into some README files or send it via mail.

cl = log --pretty=changelog --no-merges --cherry --abbrev-commit --date-order
3.2 Pretty History
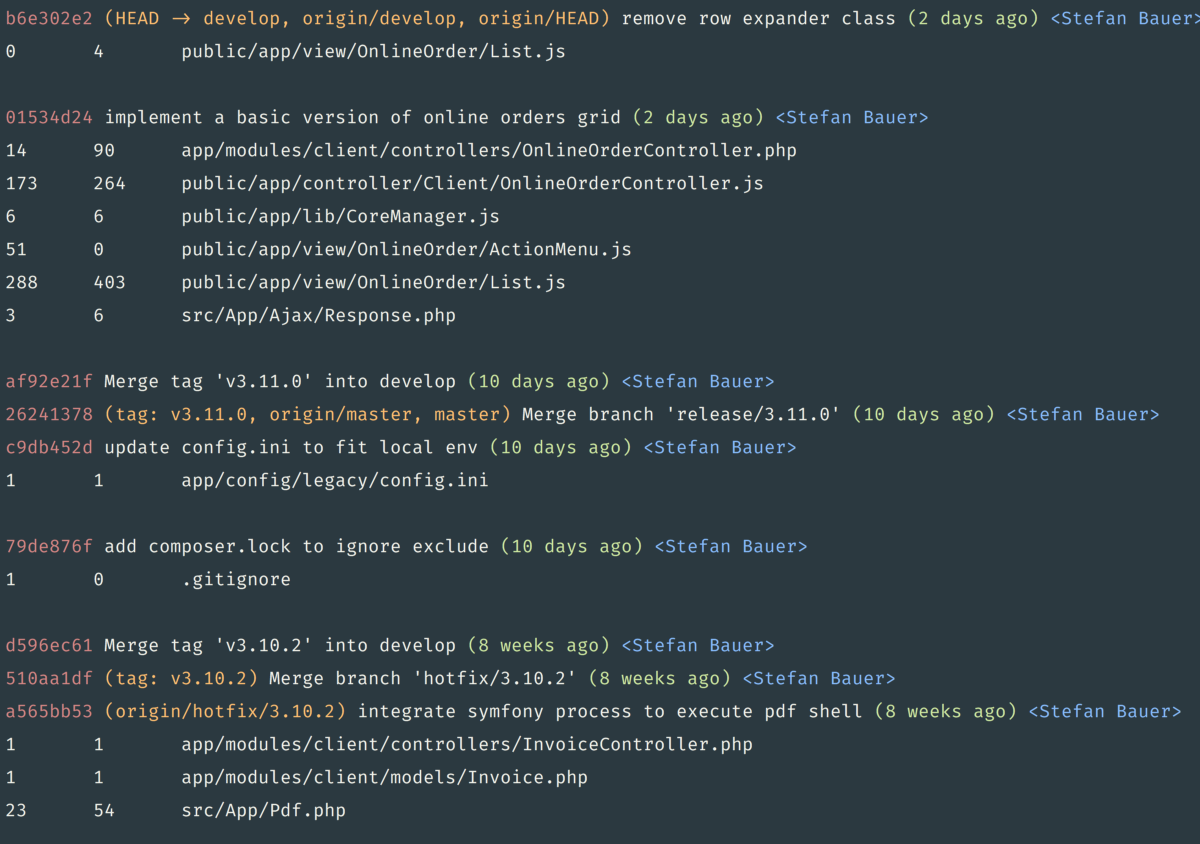
This is something I use the whole day. With that i get a very quick detailed overview about the history.

ph = log --graph --pretty=pretty-history --abbrev-commit --date=relative
3.3 Pretty Detailed History
I often use this alias because it gives me some more details about some details in history, that the very quick pretty history does not give.

pdh = log --pretty=pretty-history --decorate --numstat
3.4 File Log
When you would like to see the history of a single file, you can use the file log alias.
fl = log -u
You have to append the file you are interested in.
3.5 Stat Log
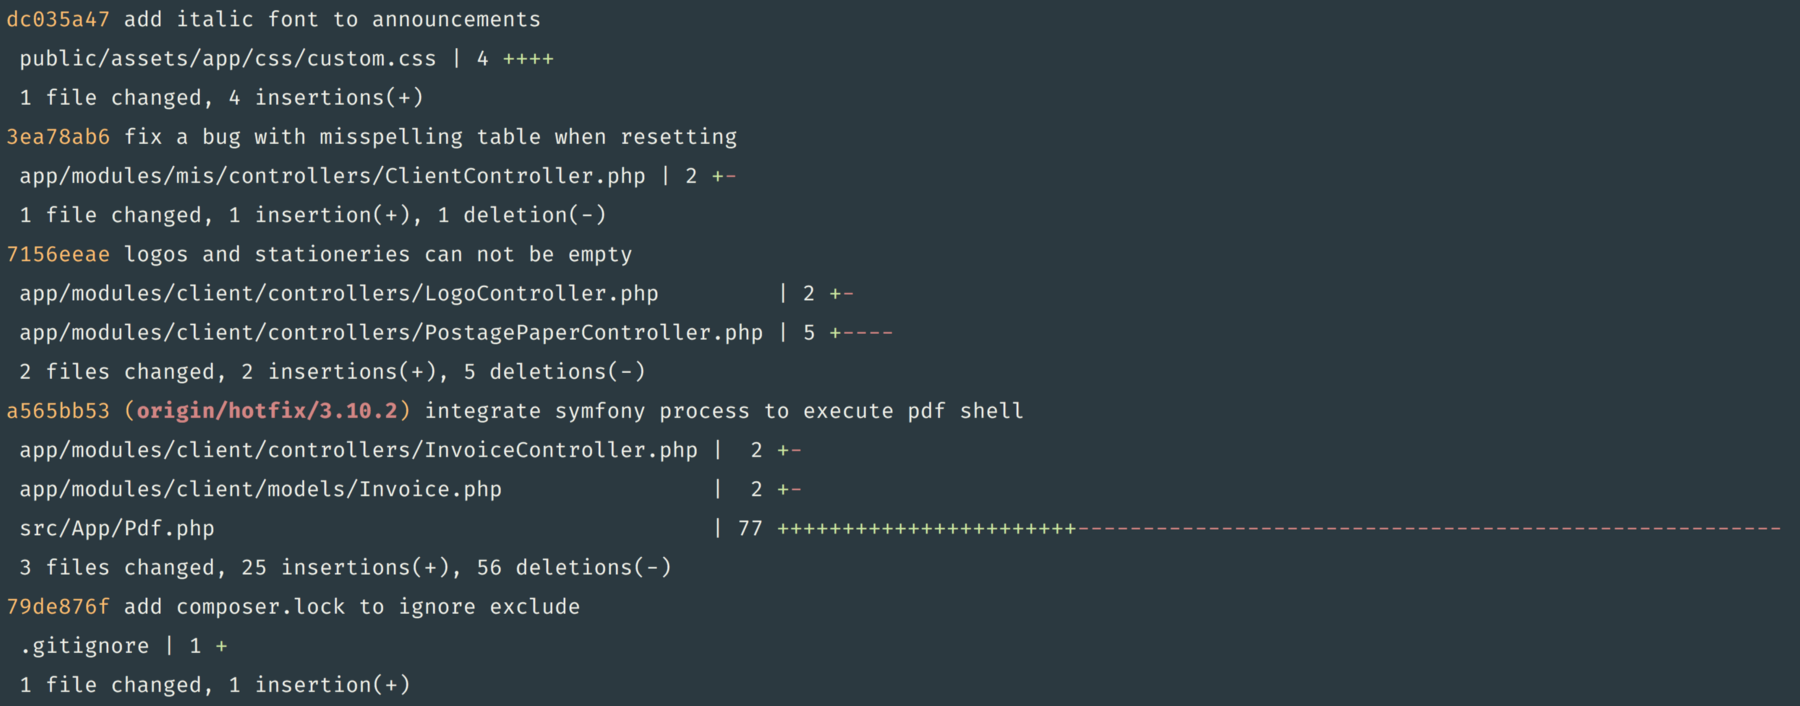
If you are interested in some stats, you can use this one. I use it not very often, but from time to time it’s useful.

sl = log --oneline --reverse --no-merges --stat
If you don’t provide a range, you get will get it from the very first commit. Otherwise you have to provide a range like:
$ git sl ca30f3b6..b6e302e2
4. Adding files to the staging area
What you do the whole day, is to add files or hunks to the staging area. Here are some easy and quick tips how you can improve your workflow. I’m going to show you how i do it.
4.1 Files that are already tracked
With this only files that are already tracked by git will be added to the staging area.
update = add -u
What i use also often is a small modification of the above, like
$ git update -p
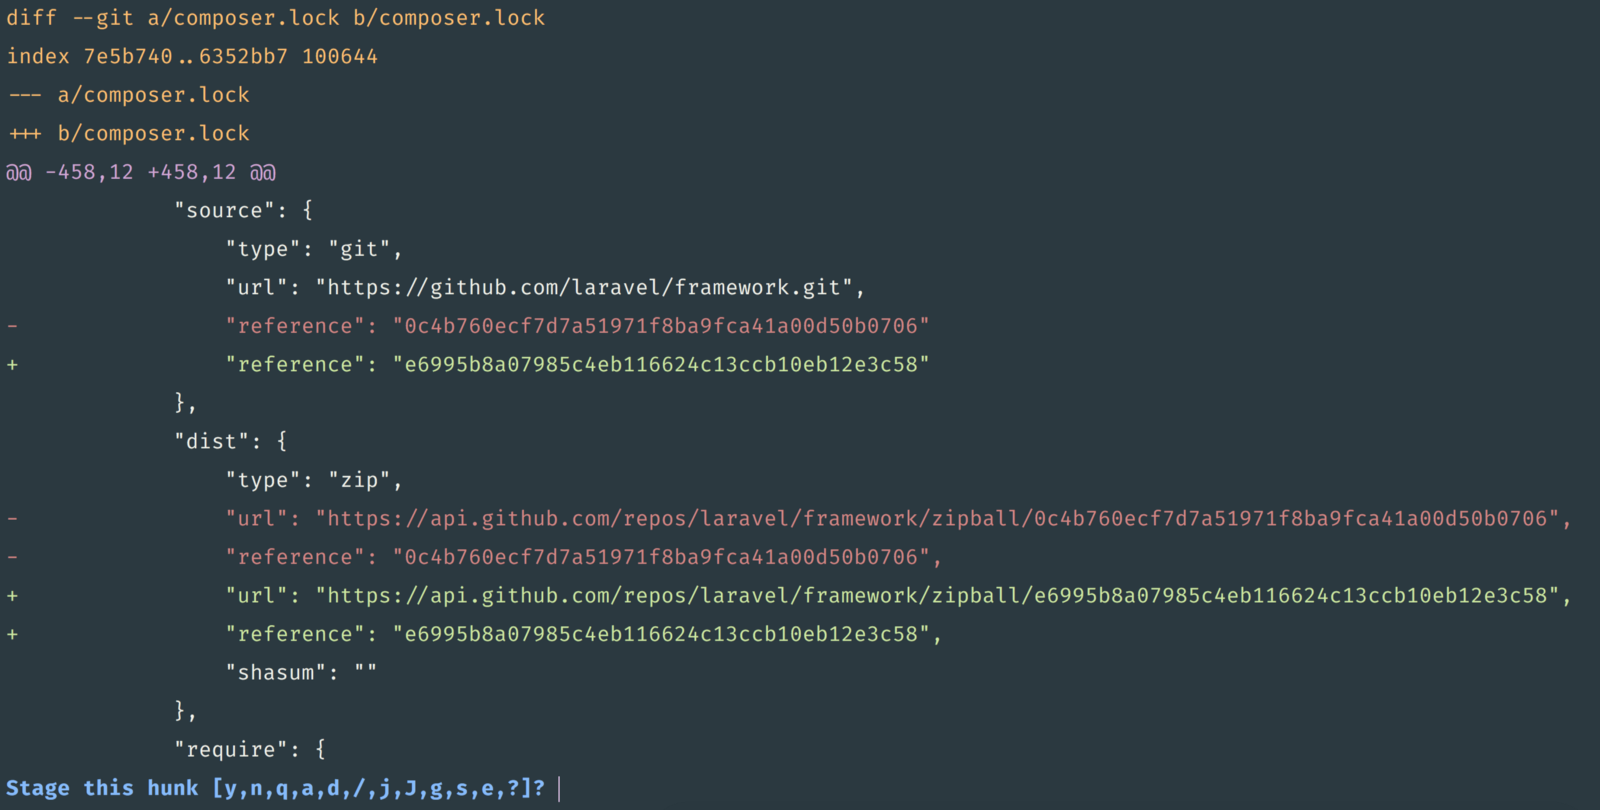
What this does, is the same as git update, so adding files to the staging area that are already tracked, but the difference is, that you get asked for each file which portion you would like to add.

Git tries its best to separate the different parts. You can choose then if you would like to
- (y) accept it
- (a) accept it and accept all other hunks in this file
- (n) discard it
- (d) discard it and discard all other hunks in this file
- (s) split it into smaller hunks
- (e) edit it
- (j) leave undecided and jump to next
- (k), leave undecided and jump to previous
4.2 Only files in the staging area
Sometimes I am only interested in adding files to the staging area, that are modified and which are already in the staging area. Sounds confusing? It does, but it helps a lot. For instance, I use it very often in combination with my coding standards. Before applying coding standards I add a file to the staging area, after that I run git cs-staged, then I have a file in the staging area (without cs-fixes) and a modified file (with cs-fixes). Then this command comes in and adds only these files, which are already in the staging area and are modified also.
I do not want to add these files blindly. Therefore I add it via -p so I can decide which hunk I would commit and which one not.
up-staged = !f() { git ls-staged; }; git add -p `f`
If you are updating/adding not the whole file (for instance if you are not satisfied with some cs-fixes) you can then bring the staging area and your local working tree to the same state with git co-staged.
5. Merging
When you merge some branches and there come up some conflicts and you don’t want to resolve the conflicts manually, you can choose which modification you would like to apply. Here we go.
5.1 Using our changes
ours = "!f() { git co --ours $@ && git add $@; }; f"
5.2 Using their changes
theirs = "!f() { git co --theirs $@ && git add $@; }; f"
6. Listing Tags
You are interested in some tags? Here we go.
6.1 Getting the last tag/latest version
In case you are using git flow as me, this alias is one i use a lot, before creating new versions or so.
lt = describe --tags --abbrev=0
What you get is something like this:
$ git lt v3.11.0
7. Applying Coding Standards
Personally I always apply the defined coding standards with the php-cs-fixer before pushing to remote. This is my workflow I am used to to. This alias is one, you need that the others are working. Don’t forget, that you need a global installed php-cs-fixer to get this working and ideally a configuration file that fit your needs in each project you are using it.
coding-standards = !php-cs-fixer fix
7.1 Applying to given file(s)
cs = !f() { git diff-tree --no-commit-id --name-only --diff-filter=ACMR -r "$1" | xargs -n1 git coding-standards; }; f
This alias is available to uniformity, but I do not use it very often. What i really use is the one below git cs-staged.
7.2 Applying to all files in the staging area (before pushing)
cs-staged = !git diff-index --cached --name-only --diff-filter=ACMR HEAD | xargs -n1 git coding-standards